
4G Camhi Camera Frequently asked questions
The 4G Camera which support MIFI function, the RJ45 Port is useless. MiFi function is used to access to the camera 4g mainboard to check the 4g mainboard and the sim card status.
here is the quick guide about how to connect 4g camera MIFi :
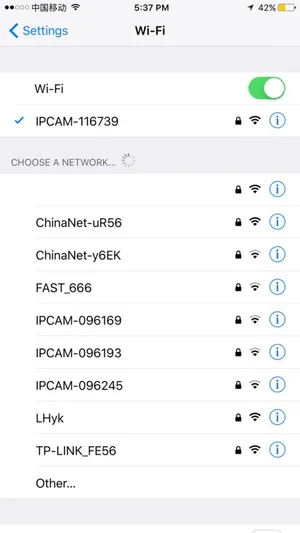
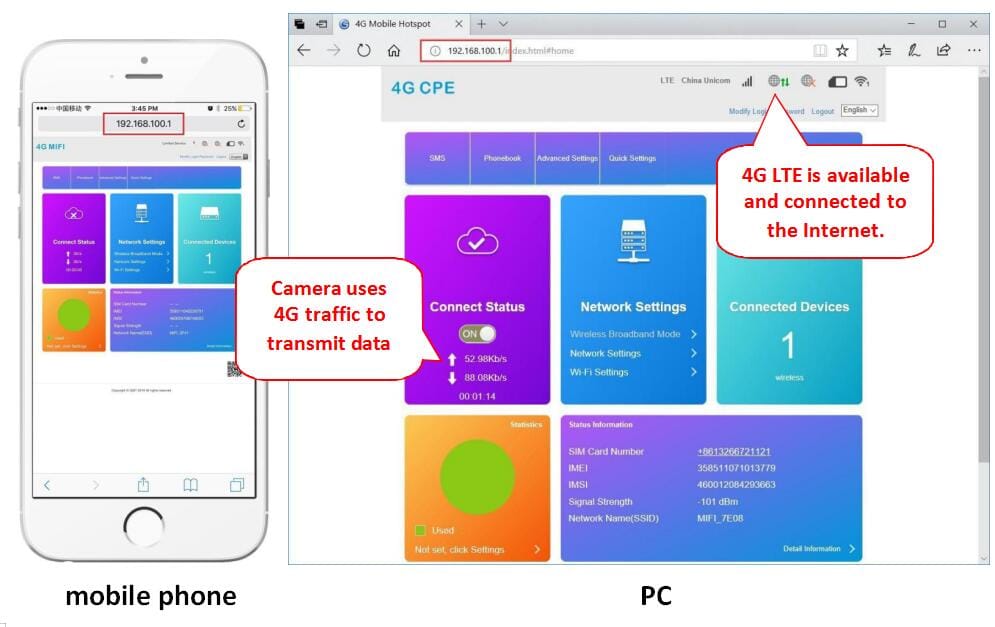
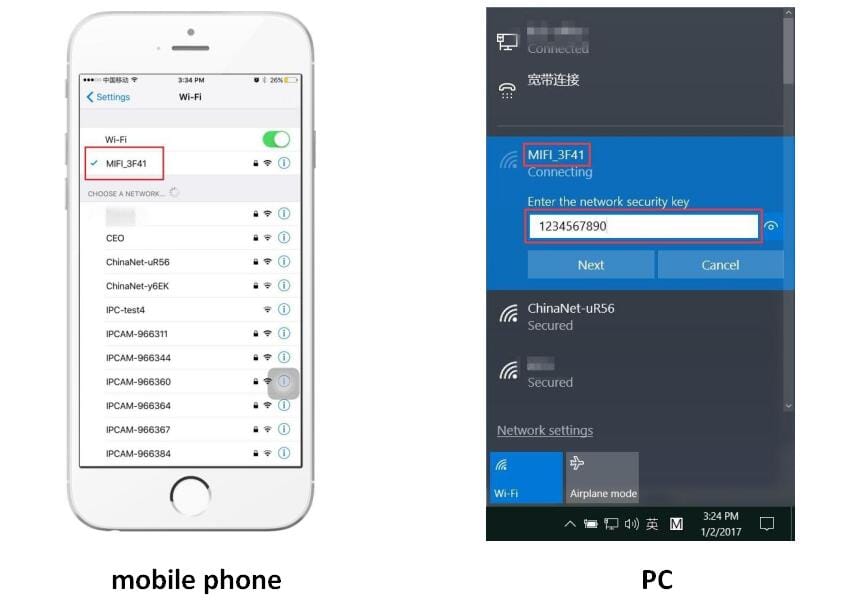
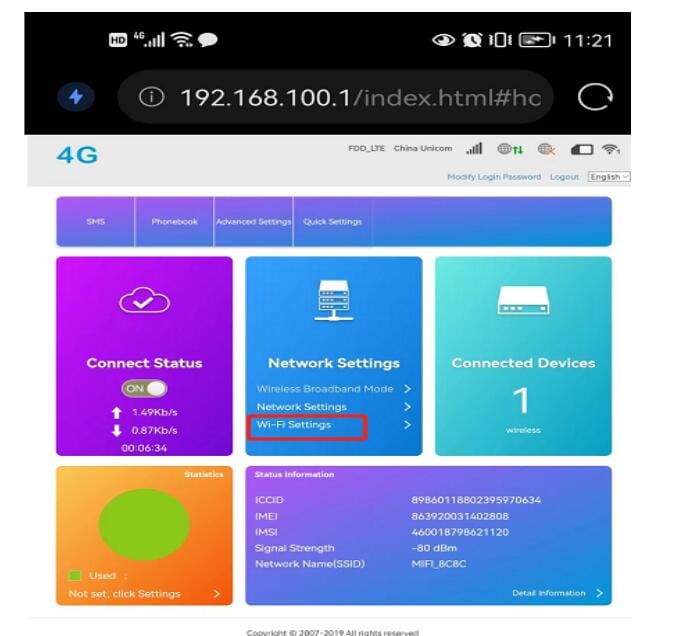
- You can find a hot spot beginning with “MIFI_” when the camera starts working, use the mobile phone or PC to connect the hot spot “MIFI_****”,the hot spot password is “1234567890”, as shown

Access “192.168.100.1” through the browser, the page password is “admin”, you can check the SIM card status on this page

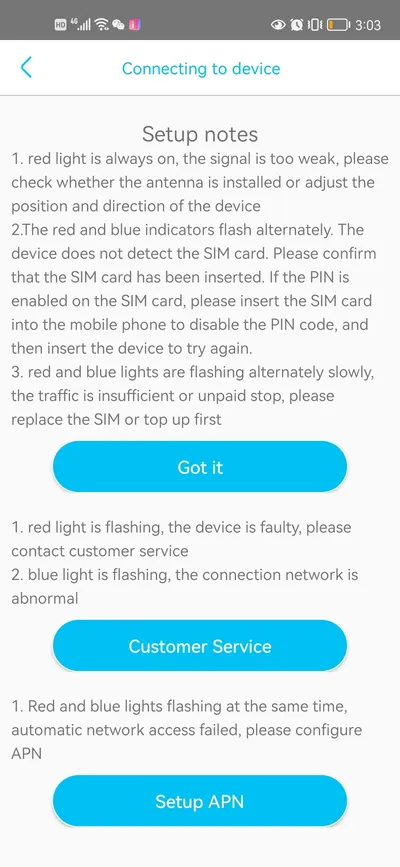
- If camera display is offline, please note thefollowing:
①Damaged card or wrong installation direction when prompted ” No SIM Card or SIM Card invalid! “, as shown below 1).
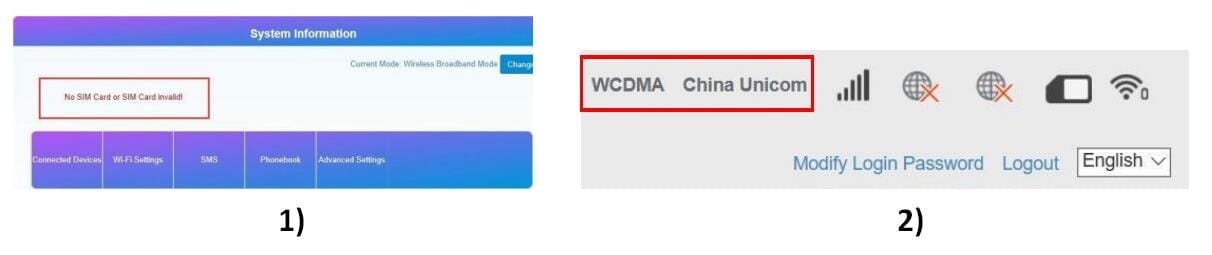
②SIM card arrears or SIM card 4G is not available when displaying non-4G (LTE), as shown above 2).
③The camera does not support the frequency of the SIM card when prompted “No Service” or “Limited Service”, as shown below 3).

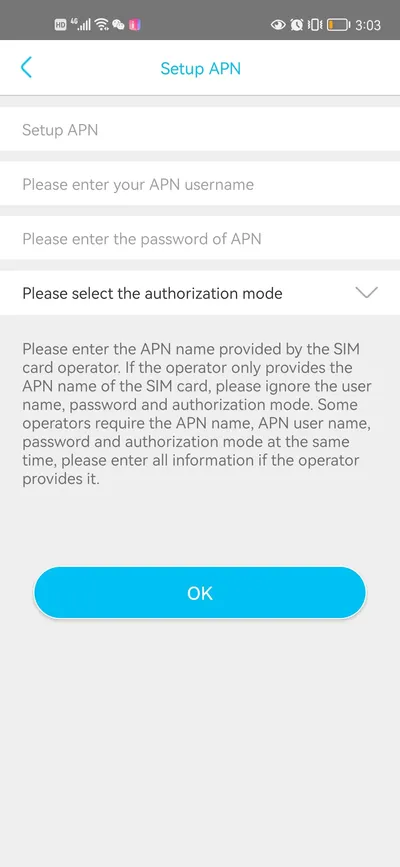
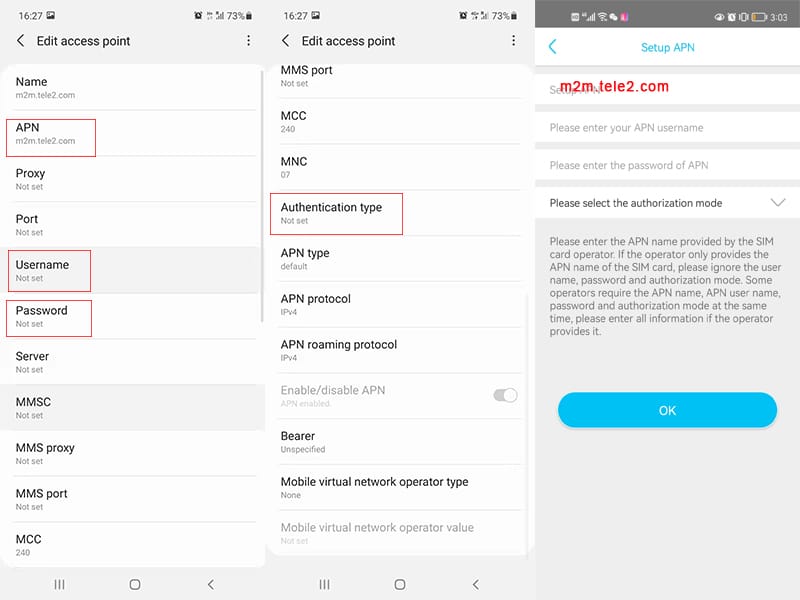
④Displaying 4G (LTE) but Internet is not available, as shown above4), the camera does not recognize the correct APN setting, you need to get the correct APN information from the 4G operator and set it up manually.
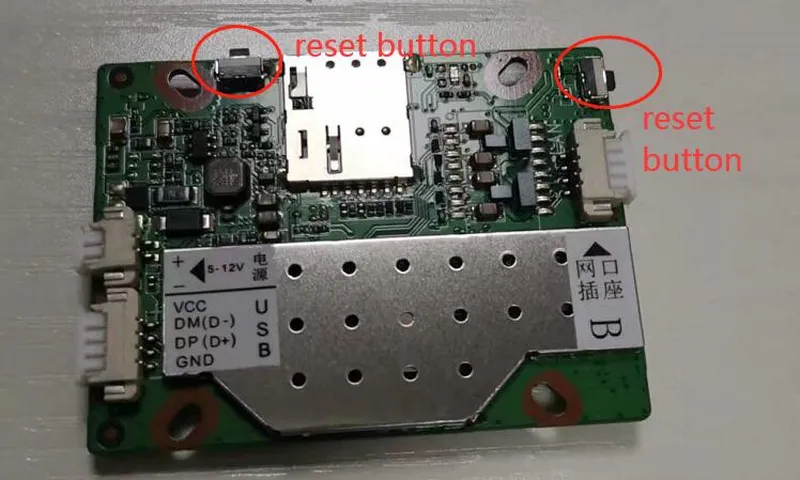
If the 4g camera do not works, you can also try to press the 4g mainboard reset button, here is the 4g mainboard reset button position.

New 4g mainboard has two reset button.For the convenience of customers, just press any one of the reset button is ok.
If the sim card works on other camera and after reset the 4g mainboard, camera still not working, please contact with the factory to do the after sale. thanks!
You can find a hot spot beginning with “MIFI_” when the camera starts working, use the mobile phone or PC to connect the hot spot “MIFI_****”, the hot spot password is “1234567890”, as shown blow.
Access “192.168.100.1” through the browser, the page password is “admin”, you can check the SIM card status on this page.
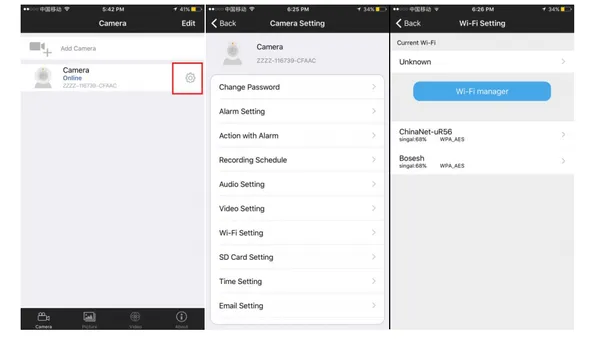
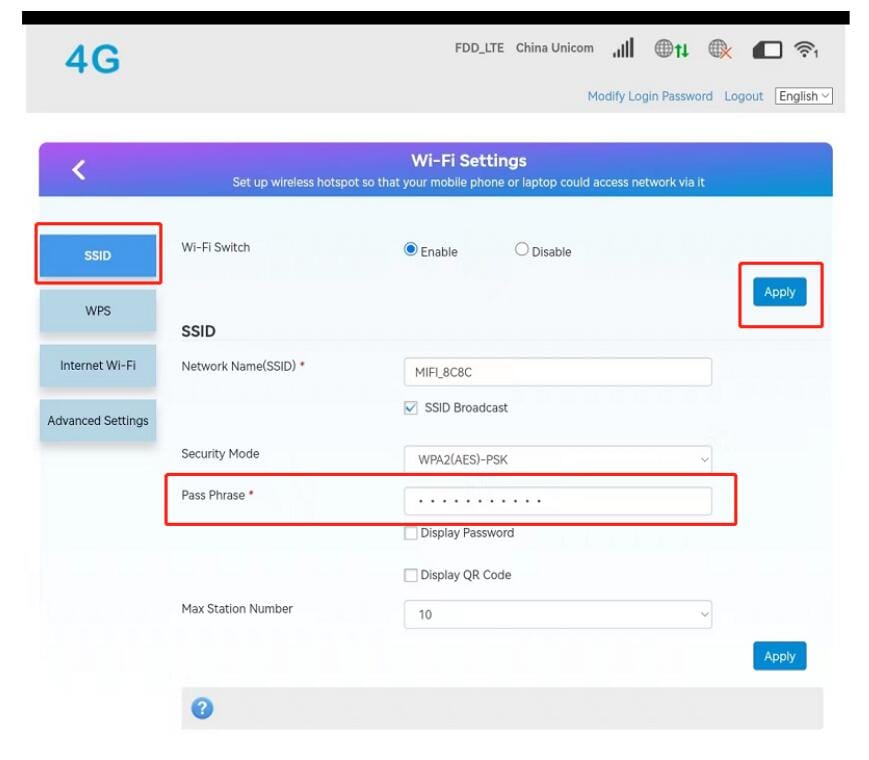
Close MIFI Function:
Click “WIFI Setting” and click “Disable” and click”apply”.Then, MIFI Closed.
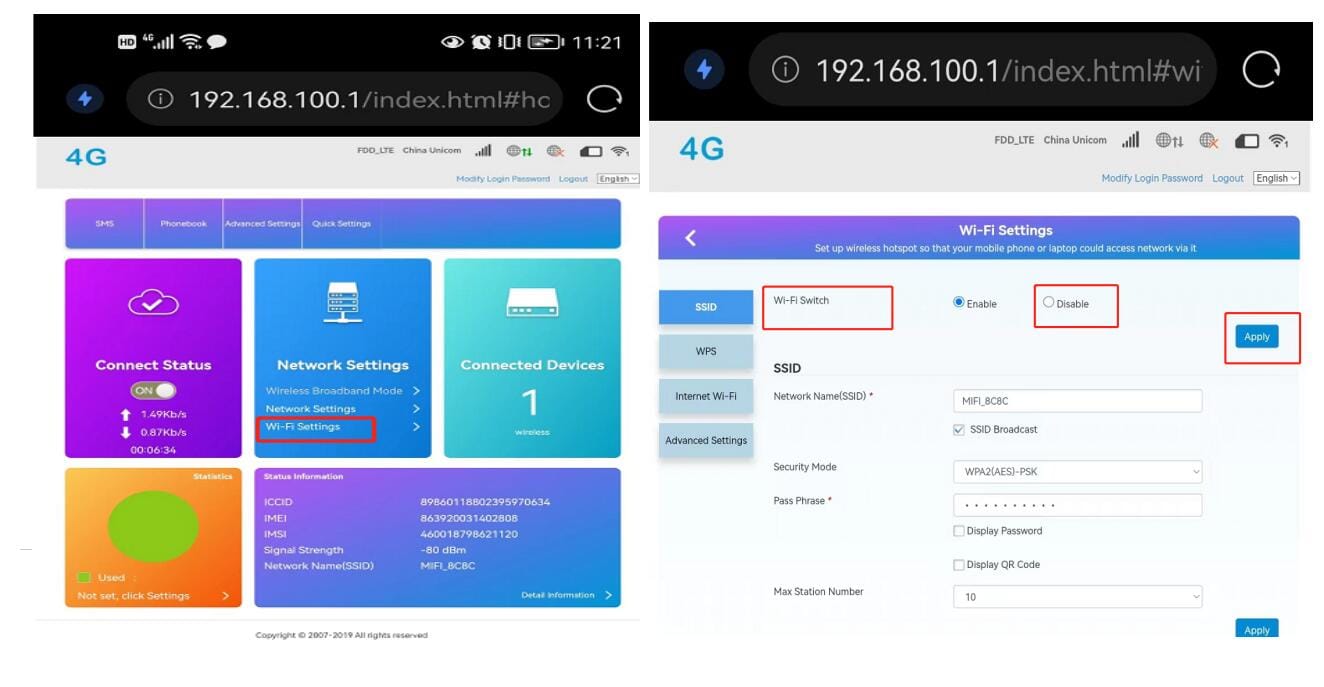
Revise MIFI password:
Click “WIFI Setting” and revise “Pass phrase ” and click”apply”.Then MIFI Password revise success.
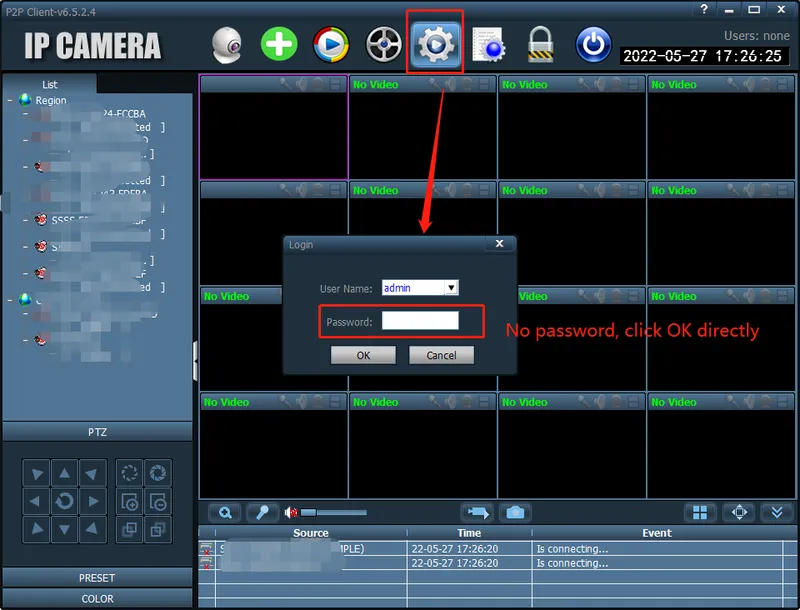
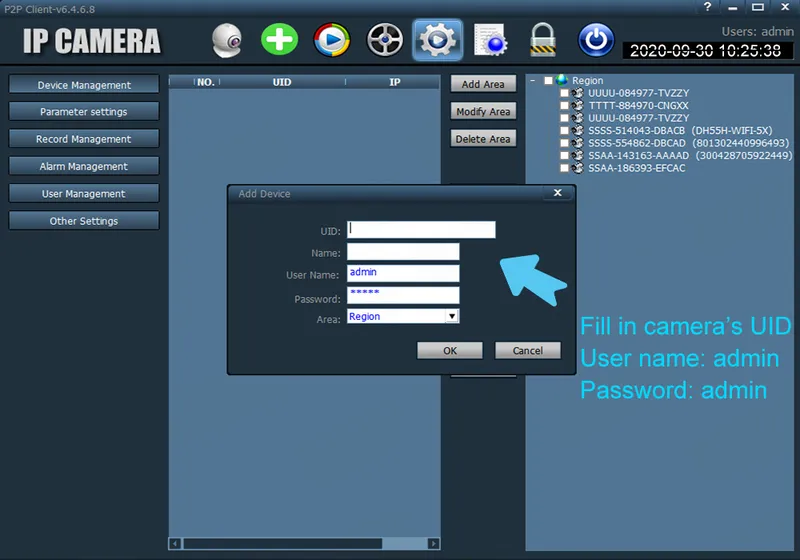
Click setting button to enter the software, default there is no password, click to ok to enter the software directly. if you change the password in the future, please remember the password, it is important!
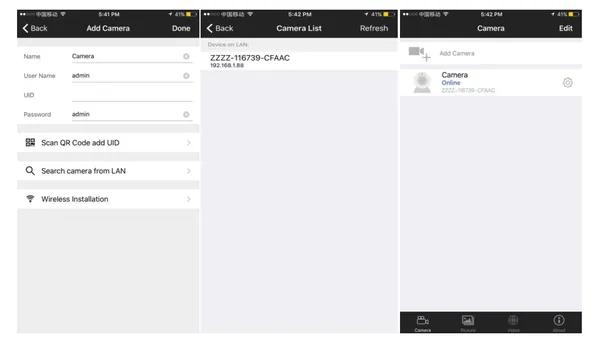
Run the client and enter the “Config” page, click “Input UID” to add the camera ,
you can find the UID serial number on the label of the camera.
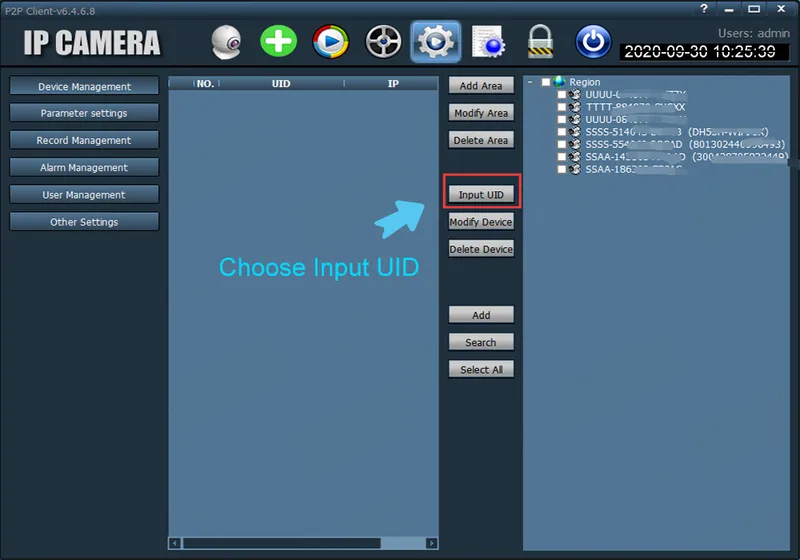
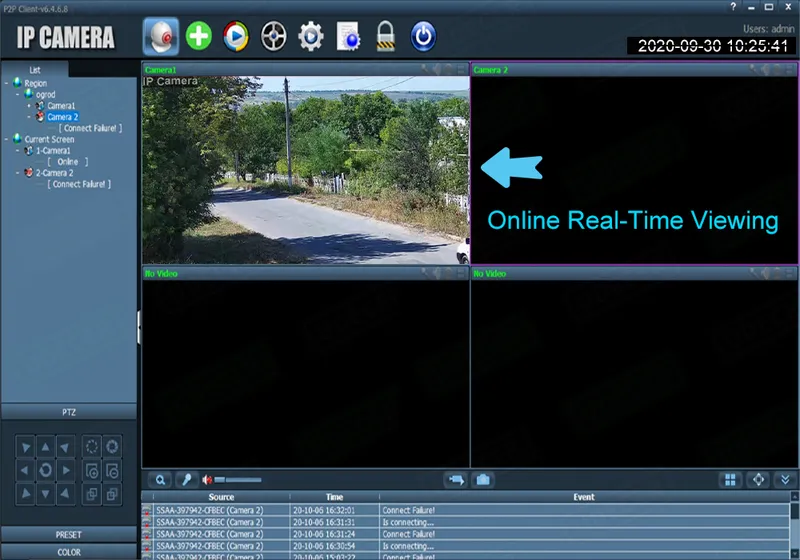
After adding the camera, double-click the camera to watch the live video.
In the client, you can manage multiple cameras and watch up to 32 channel live videos at the same time, you can save the video on the computer, you can playback the local video (computer) and remote video (SD card), you can configure parameters of camera etc., please read instructions for more information
Support, we have provided apple Mac operating system management client.
1. Setting motion detection
If you want to monitor a zone fixed, when the zone has exception, it enables alarm, you can choose motion detection function. Settings like below. The equipment can support 4 zones setting, you can enable it through tick the option box at the bottom of page. When enable a zone, the zone box will display on the screen, and list zone number, moving mouse to this zone box, you can drag the box to any position; also can move mouse to red box at the bottom right corner, drag it to change the size. After setting, click apply, motion detection will take effect.

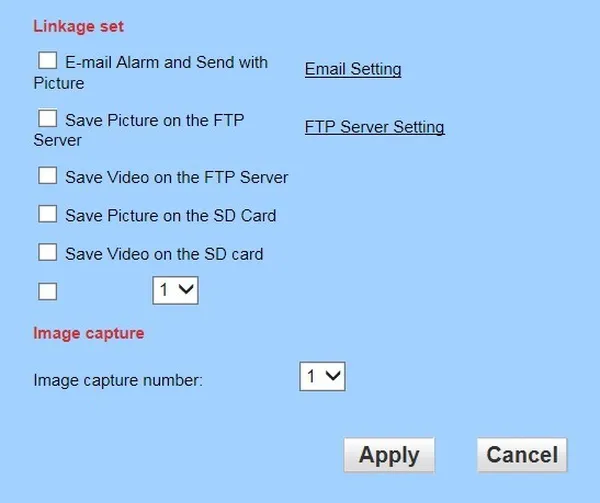
2. Setting alarm Linkage
When alarm triggered, the equipment will alarm with many ways, as shown in below picture:
- send alarm and pictures toemail
- send captured pictures to assigned FTP server
- send video recording to assigned FTPserver
- capture a picture, then save to TFCard
- Recording a video for 15 seconds, then save to TF card (including 1-3 seconds warning beforevideo)
- linkage Preset: after the alarm, callpreset
- alarm capture quanity, setting as required (1-3piece
If you want set Email alarm, please tick ”E-mail Alarm and Send with Picture”. and then click “Email setting”

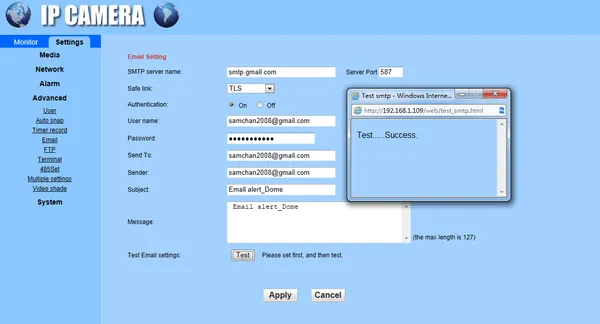
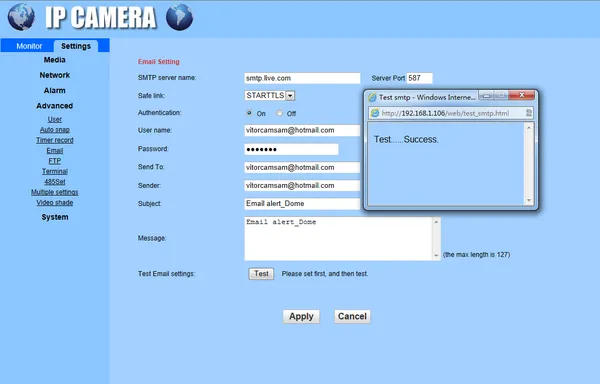
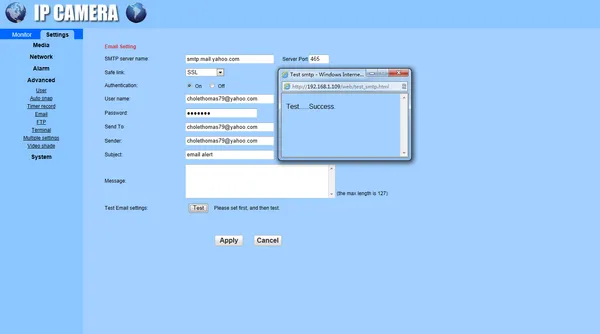
3. Setting Email
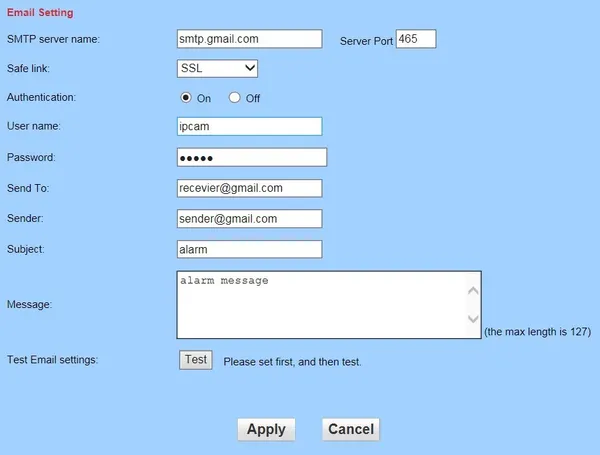
The items in above picture is mandatory fields need to fill in. If the filled content is not qulified, the setting will not be successful. After writing completed, click Apply firstly, then testing, it will reminder testing successfully when finished.
Note:
- The server of sending email should support POP3 protocol. In order to strengthen security and reduce spam, Many mail server closed this protocol at present. So users need to check if the server support POP3 before choose mail server, otherwise the mail can not send
- For some mail server using SSL certificate, it must enable SSL option, then can send email successfully.
Some mailboxes require additional security settings, such as Gmail messages, you need to log in to your google account, open to allow less secure apps in “Sign-in & security” page.

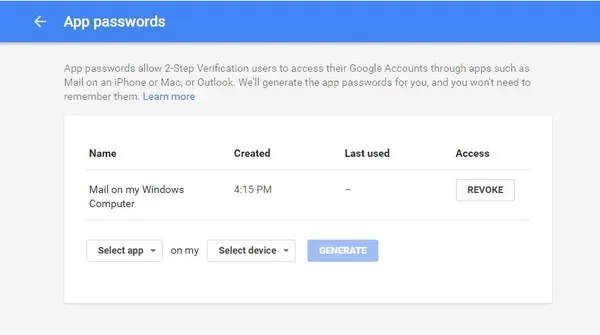
If your Gmail mailbox opened “2-Step Verification”, then you need to set up a separate “app passwords” for camera login,
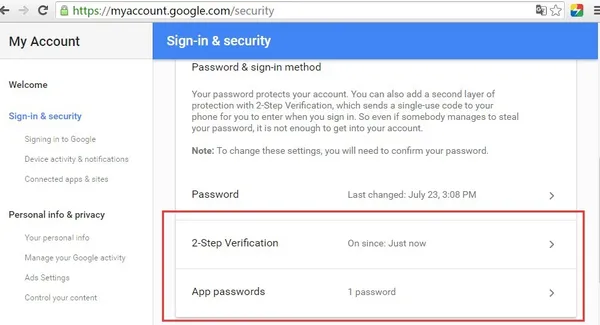
How to set up “app password” you can click on the “Learn more” to get help
If you do not know the security settings of other mailboxes, we recommended use Gmail.
Setting alarmtime
The equipment will trigger alarm only after detected alarm in protection period. So you need to select which time to set protection carefully.
Note: When setting time, please adjust system time firstly.

Some mail box setting for example:
The password is incorrect or the password set after the last connection is forgotten?
A: The camera password may have been changed, please press the “Reset” button of the camera for 5 seconds. the camera voice prompts “dong…”, then follow the steps above to re-add the camera.
About the 4G Camera which support MIFI :
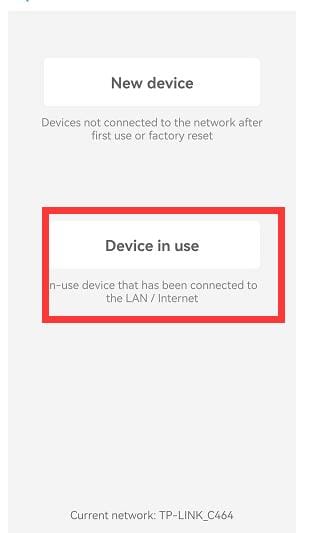
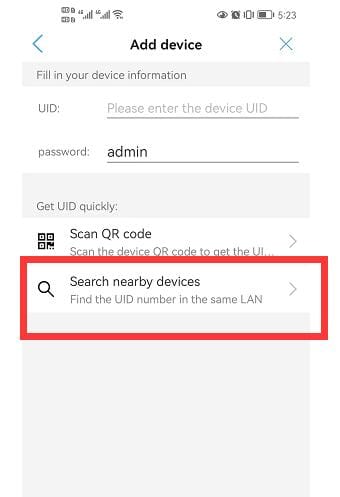
you can close mobile phone mobile data,connect camera with MIFI firstly, and then open camhi or camhipro app, click add camera, click network camera, clieck “Devices already connected to the local area network, the Internet in use”, then click “search local device”, and then you can see the camera correct ID.
About the 4G Camera which no MIFI, but rj45 network port works:
Connect the camera with router via network cable,and mobile phone also connect with the same router.
and then open camhi or camhipro app, click add camera, click network camera, clieck “Devices already connected to the local area network, the Internet in use”, then click “search local device”, and then you can see the camera correct ID.

A: Please check if the alarm push is turned on and the alarm settings are correct(Setting – Alarm manage and notification), whether the APP allows push permission on the mobile phone.